OLYMPIA NOISE CO.
Electronic Musical Instruments

Recent Blog Posts
Manual
for dot Melody 1.0
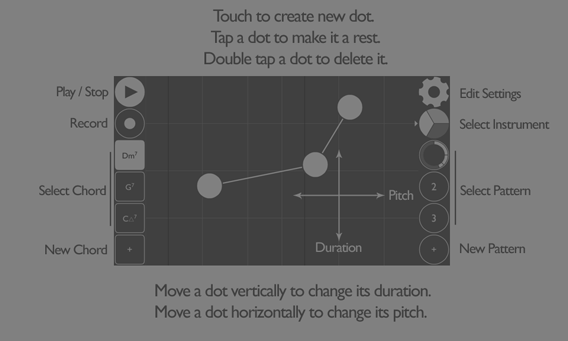
The Sequencer
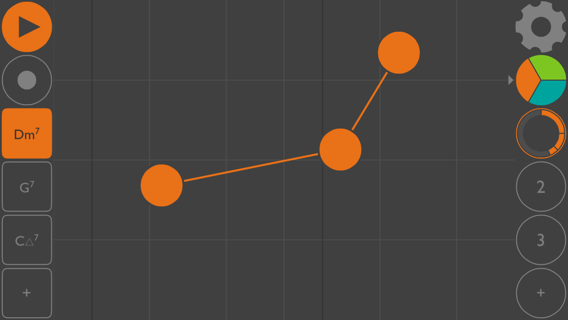
The heart of dot Melody is the sequencer screen. Tap or drag anywhere to create a new dot. Each dot plays a note. You can change the pitch of the note by moving it left or right on the screen. You change the duration of the note by moving the dot up and down.
You can tap on an existing dot to make it a rest. Double tap to erase it.
Press the play button in the top left corner to start/stop the song.
On the left side of the screen are the chords for your song. The dots will always play notes from the currently selected chord. You'll notice in the background there are vertical lines that show you where the notes fall on the screen. The dark lines show you where the root of the current chord is.
To change chords, simply press a different chord button and hear your melody transform. You can add new chords with the + button at the bottom left.
The three-colored button near the top right is the instrument button. Press it to switch to a different instrument. There are three instruments : Lead, Bass, and Drums.
While they all play at the same time, they work in a slightly different way from each other. When changing chords, the melody instrument will always play the closest available note in the chord. The bass instrument transposes based on the chord -- the root of the chord is always in the horizontal center of the screen. As you might guess, the drums are not affected by chord changes.
Below the instrument button are the pattern buttons. Each pattern is a new group of dots. Tap to change between patterns. Tap the + button to make a new pattern.
In the top right of the screen is the edit button. Tapping that will open up the editor where you can modify other aspects of your song. You can also long press on most buttons to jump straight to the editor for the related setting.
Tempo
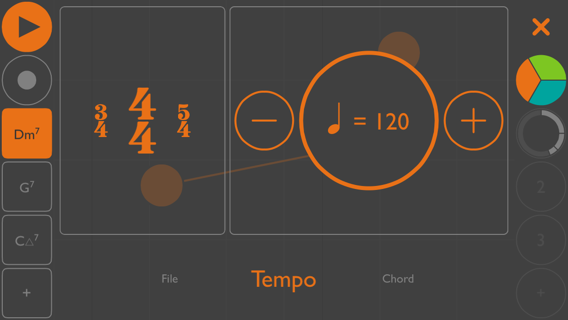
Use the tempo screen to change the time signature and tempo of the song. You can use the tempo button as a "tap tempo" by tapping on it, or use the +/- buttons. The time signature button changes the quantize length of each pattern. For example, in 4/4, each pattern with be lengthened to create measures that are 4 quarter notes long. Use the x/x time signature to turn off quantization. This will result in the different instruments having different repeat lengths, causing super-awesome synced phasing to happen ala Steve Reich's "Clapping Music."
Chords
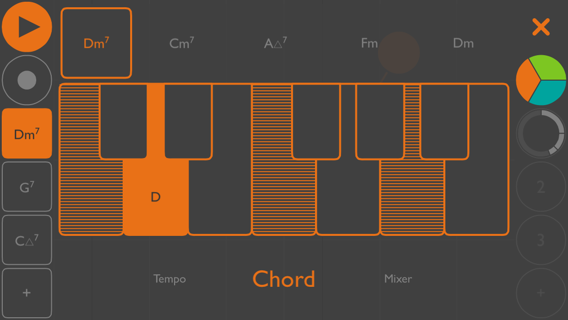
Use the chord editor to change the pitches that are played in your patterns. Select the chord you'd like to edit from the left side of the screen. Along the top are suggestions from the tonality you selected when you made your song. These include triads and seventh chords from both major and minor keys. You can also type in whatever pitches you like and we'll try to guess what the chord is called. Double tap a key to make that the root of the chord -- this is important because the bass instrument always has the root of the chord in the center of the screen!
Instrument
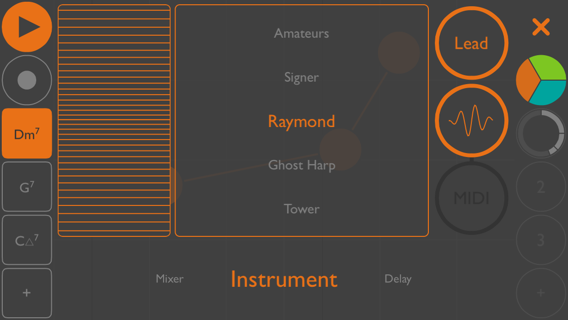
dot Melody comes with a whole bunch of built-in instruments. This screen shows you the options. Change instruments with the instrument button on the right.
On the left of the screen is the mod wheel. Different instruments respond to the mod wheel in different ways. In MIDI mode, it sends data on CC1.
MIDI mode is available as an In-App Purchase. In MIDI mode, you can send any or all of your instruments out to other apps via Virtual MIDI, wireless or hardware MIDI ports.
Mixer
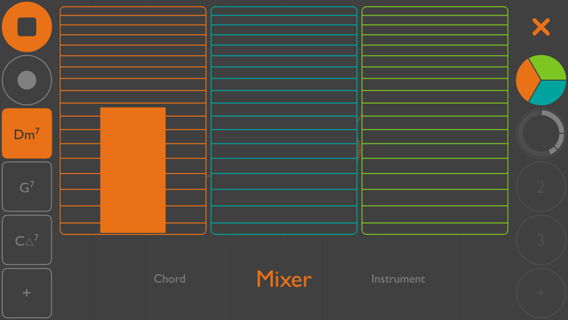
The mixer screen does just what you think: it allows you to change the volume of each instrument. If an instrument is in MIDI mode, the mixer for that instrument will be greyed out.
Delay
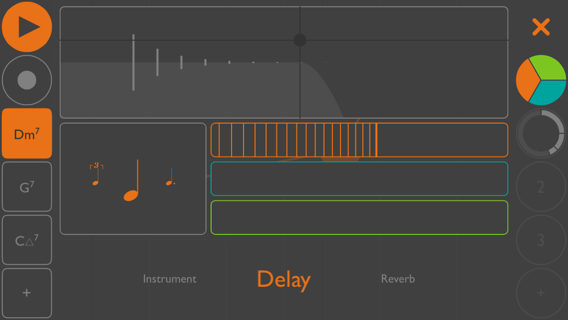
The delay effect is set up as an aux send that each instrument can be sent to in independent amounts, via the horizontal faders. Use the XY control to change the amount of feedback (up/down) and the feedback filter amount (left/right). The delay is synced to the tempo and can be changed with the control to the left of the faders.
Reverb
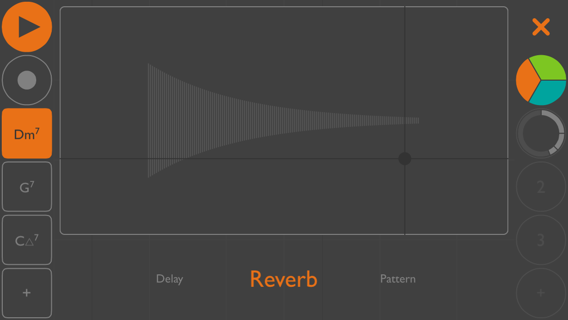
The reverb effect affects all instruments, post delay effect. Use the XY control to change the amount (up/down) and length (left/right) of the effect.
Pattern
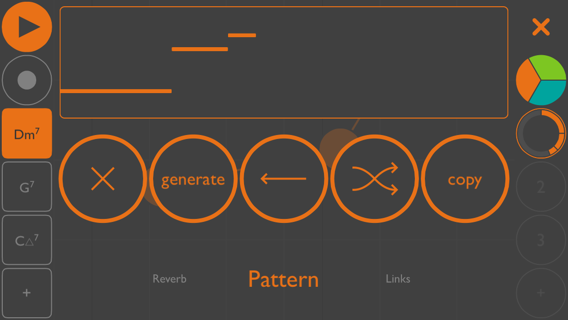
The pattern editor lets you do some fun stuff with your patterns. First, choose the pattern and instrument you'd like to edit using the instrument & pattern buttons on the right of the screen. Change the order of your dots with the editor at the top of the screen. The x button erases your pattern on the current instrument. Use 'generate' to erase the pattern and create a new one randomly. The arrow button reverses the pattern. The double arrow button shuffles the order of the existing steps. To copy a pattern (across all instruments) tap the copy button, then choose the pattern number you'd like to copy it to. Press the + button if you'd like to copy it to a new pattern.
File
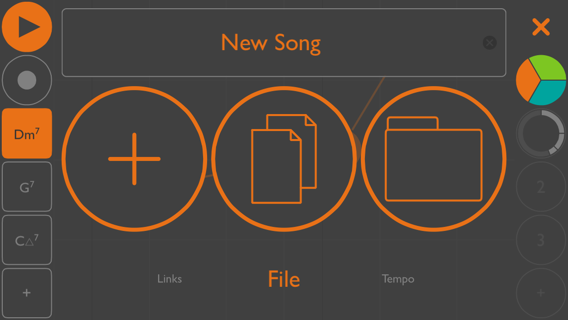
Rename your file with the text field at the top. The + button creates a new song (after saving your current song, of course). The middle button duplicates the existing song. Press the folder button to load a previous song from disk.
New File
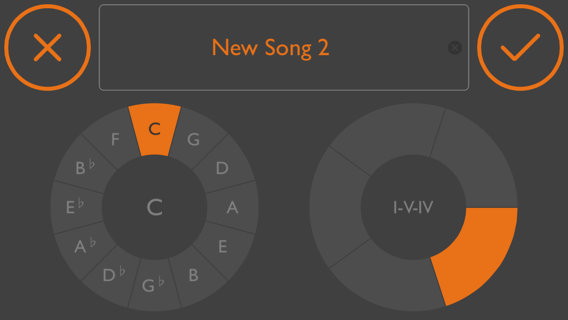
When creating a new song, you can choose the starting tonality and chords. Choose a key from the left circle, and a set of starting chords using the right circle. For example, choosing I IV V in the key of G will give you the chords G, C, and D.