OLYMPIA NOISE CO.
Electronic Musical Instruments

Recent Blog Posts
Manual
for Chordion 1.2
The older manual can be accessed here.
GETTING AROUND
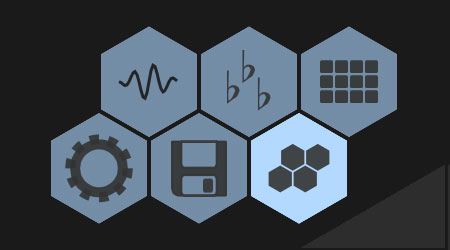
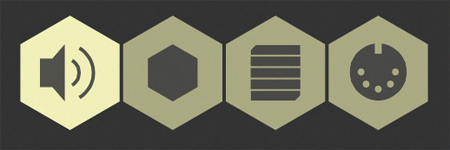
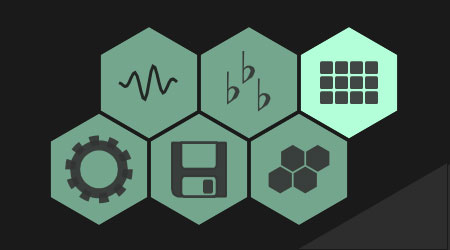
In the top left corner of the screen is the navigator. Each hex is a different screen. Clockwise from the top left : INSTRUMENT, LAYOUT, SEQUENCER, PLAY, SAVE, SETTINGS/LINKS.
PLAY
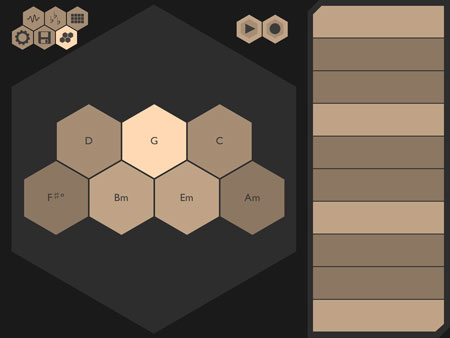
The PLAY screen is where all the fun happens. Press any of the chord hexagons to play a chord. Play melodies on the keyboard on the right of the screen.
LAYOUT VIEW
The LAYOUT VIEW is used to change the chord and keyboard layout for the play screen. There are three different pages in the layout view.
EASY LAYOUT
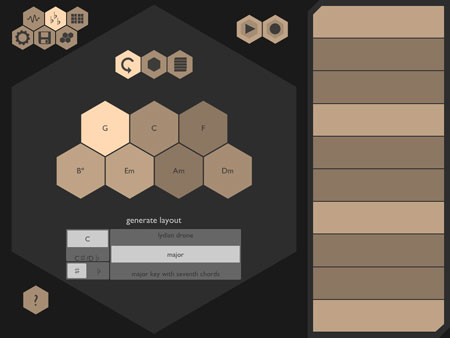
In EASY mode, you can choose from a variety of layout templates. Choose a key and a layout, and we'll do the rest.
CUSTOM LAYOUT
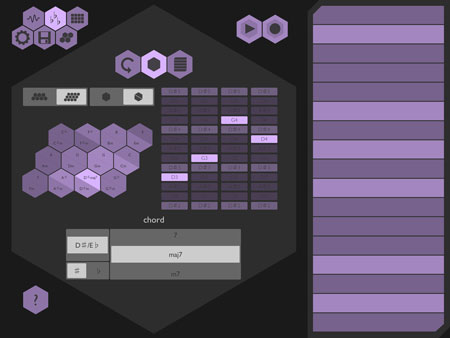
If the templates aren't what you are looking for, you can customize your layout to include (almost) any set of chords you like. On the left there are two switches to allow you to choose the number of hexagons on the layout (7 or 12), and the number of chords in each hexagon (1 or 2).
To change the chord of a hexagon, tap the hexagon you wish to change and select a new chord from the menus at the bottom.
CHORD VOICING EDITOR
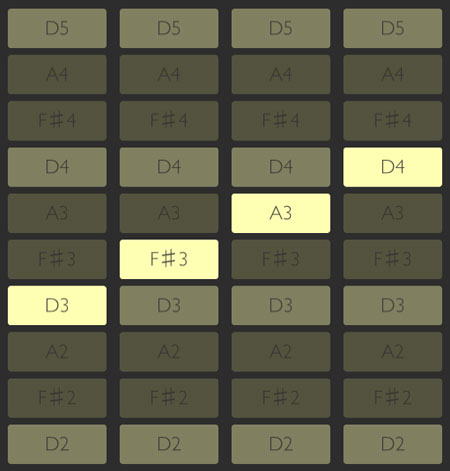
In addition to picking the chord type, you can also set the VOICING for each chord. Voicing simply means "how the chord is played." There are many ways to play a C major chord - using different bass notes, in different octaves, etc. These are all different voicings for the same chord.
The voicing editor lets you choose up to 4 pitches to use in voicing the currently selected chord. Play around and find the voicing to suit your needs.
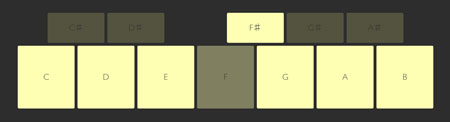
KEYBOARD
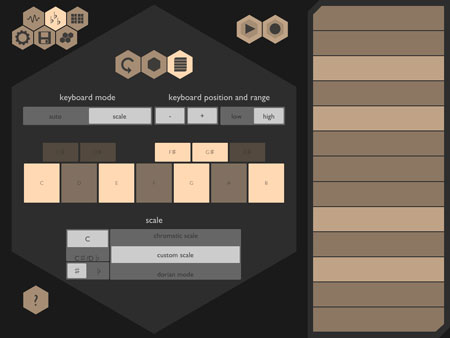
Chordion has two modes for the keyboard. The default keyboard mode is AUTO. In AUTO mode, the keyboard is limited to the notes of whatever chord is currently being played. This is great for intuitive playing and making sure you never will hit a wrong note. Chordion also has a SCALE mode, in which the keyboard plays a scale.
KEYBOARD POSITION simply tranposes the keyboard up or down, staying in the scale or chord you have selected. KEYBOARD RANGE will change the number of keys available on the keyboard.
SCALE EDITOR
In SCALE mode, the keyboard is set to play only notes from a scale. You can choose a scale from the bottom, or use the editor to type in a custom scale of your choosing. Simply select the notes you wish to have in your scale.
INSTRUMENT VIEW
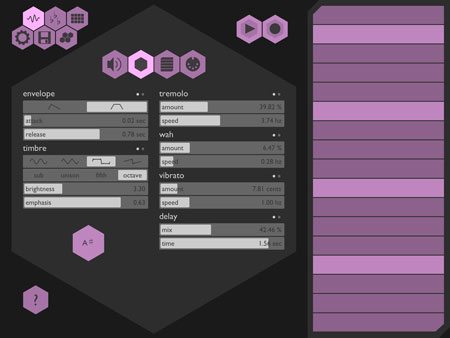
The INSTRUMENT EDITOR allows you to customize the sound of your instruments or to enable MIDI mode.
There are four pages here, a MIXER view, CHORD view, KEYBOARD view, and MIDI view. These are accessed with the four hexagons in the top center of the screen.
The MIXER view is used to change the volumes of the instruments and to add reverb to the overall mix. You can also decide which DRUM MACHINE to use.
CHORD and KEYBOARD views are nearly identical, and allow you controls for changing the sound of each instrument. Play around with these and learn how they sound!
The ENVELOPE controls allow you to change the volume envelope of your sound. The first slider chooses between PLUCK and SUSTAIN modes. In PLUCK the sound will alway be the same duration, regardless of how long you hold a key or chord down. SUSTAIN allows you to hold a note out until you let go. PLUCK is great from strumming with the keyboard.
ATTACK is the amount of time it takes from the onset of a note to the loudest volume. A short ATTACK makes for a percussive sound, longer settings make for gentler sounds. DECAY/RELEASE is the amount of time to return to silence after releasing the key (SUSTAIN mode) or, in PLUCK mode, how long to return to silence immediately after the ATTACK phase.
Tap the two little dots on the ENVELOPE section, and you will see another setting - TIMBRE MODULATION. This control applies the envelope to modulate the filter controls.
TIMBRE controls allow you to change the waveform your instruments use. Choose from classic waveshapes : SINE, TRIANGLE, SQUARE, and SAWTOOTH. Below these, you can choose a doubling amount for a second oscillator : SUB, UNISON, FIFTH, and OCTAVE. These can help thicken up the sound of your instrument.
The BRIGHTNESS & EMPHASIS control the settings of a low pass filter.
Tap on the two dots of the TIMBRE section to see the DETUNE controls. This is used to slightly detune the two oscillators from each other.
POLYPHONY (KEYBOARD instrument only) controls allow you to choose whether the keyboard can play multiple notes at a time (POLY), or only one (MONO). In MONO mode, you can also choose PORTAMENTO time, which is the amount of time a note takes to slide to the next note. This is useful for making "theremin" style sounds.
TREMOLO, WAH, and VIBRATO are all effects that modulate (change) parameters of your sound in time, using an LFO (low frequency oscillator). TREMOLO modulates the volume, while WAH modulates the BRIGHTNESS parameter of the filter. VIBRATO is a pitch modulation. All three effects have two pages of controls, tap the two dots to switch between them. The paramters are DEPTH (the amount of the effect), RATE (the speed of the effect), WAVESHAPE (the shape of the effect), and DELAY time (how long before the effect fades in for each note). Play around with these to see what they sound like!
DELAY is a simple echo effect. The settings are MIX (the loudness of the effect), TIME (time between repeats), and FEEDBACK (the number of repeats).
MIDI
MIDI stands for "Musical Instrument Digital Interface," and is a way for musical devices to communicate information to one another. MIDI mode allows you to use Chordion as a controller to send notes to other digital musical instruments.
To enable MIDI mode, first turn CHORDION MODE to MIDI. You will notice that all other sound controls disappear and that Chordion's audio engine is disabled. This is because the sound will now be generated by another device. The drum machine and arpeggiator are also disabled in MIDI mode.
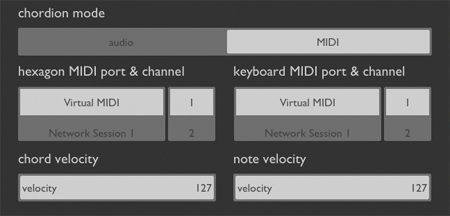
MIDI information is sent to another device, or PORT, on a MIDI CHANNEL. The MIDI channel allows a device to route MIDI information to different voices. Both the Chord Hexagons and the Keyboard can be set to use their own MIDI port and Channel.
If you own a MIDI output device (such as iRig), it will show up in the MIDI Port menu. If not, you have two other options: Virtual MIDI and Network Session.
Choose Virtual MIDI if you would like control another app on your iPad with Chordion. After selecting Virtual MIDI, open up your other app. If the app supports Virtual MIDI, you should see Chordion listed as a MIDI source in the app's MIDI setup. Please note that many apps need "Background Audio" to be turned on, otherwise they will not make sound when Chordion is in the foreground. Please consult the user manual of your chosen app for more information.
Network Session allows you to send MIDI data over a wireless network. For example, you might want to use Chordion to control a piano instrument inside Garageband on your desktop computer. This works best over an ad-hoc network (i.e. computer-to-computer, without a router), but will work fine on a normal wireless network with some latency.
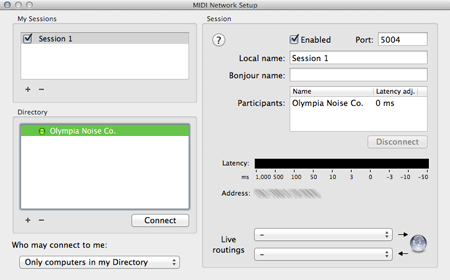
To use the Network Session, you will need to connect your device to your computers MIDI setup. On a Mac, you can do this from your AUDIO MIDI SETUP, which is in Applications>Utilities. (For information on how to do this on other operating systems, consult Google or your local computer music expert). Once in Audio MIDI Setup, open the MIDI view by selecting Window>Show MIDI Window. Double click on the Network device in the MIDI view. Create a new session under "My Sessions" by clicking on the plus button. Enable your new session with the check box. Your iPad should show up in the "Directory" menu. Choose your device and hit "Connect." You should now see the device listed in the participants on the right side of the window. When you play notes on Chordion, you should see little red lines show up in the latency graph on the right. If you don't, something is not working correctly. Open up Garageband (or other software) and jam. Please consult your other application's user manual for more information about MIDI devices and setup.
SEQUENCER
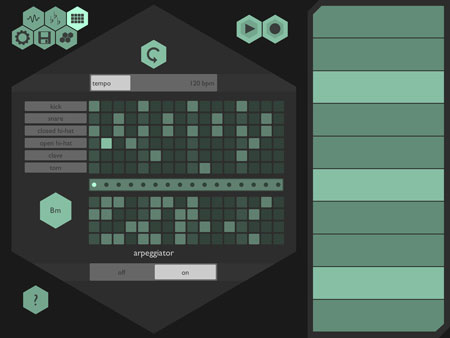
The SEQUENCER page is all about rhythm. The top half is the drum machine and the bottom is the arpeggiator. The TEMPO is the speed of the sequencer. Change the number of sequencer steps with the strip between the drum machine and arpeggiator. You can load template sequences from the hex at the top of the screen.
The DRUM MACHINE sequencer has six drum sounds. Tap on a square to toggle that step on or off. Double tap for accents.
The ARPEGGIATOR "breaks apart" the notes from whatever chord you are playing. You can create an ostinato or a rhythmic pulse. The effect will also depend largely on the instrument you are using. The four rows correspond to the notes of the chord voicing from the layout screen. They will always be arranged low-to-high in pitch.
TRANSPORT
![]()
The PLAY button is used to start and stop the DRUM MACHINE. If the ARPEGGIATOR is already playing, it will start in mid-sequence.
The RECORD button records your performance to an audio file. Once you are done, you can upload the sound to SoundCloud or Dropbox (accounts required...). You can also save to iTunes File Sharing.
DROPBOX USERS: Please note that at this time there is a "bug" in which Chordion hangs on the "saving" indicator while uploading to Dropbox. We will fix this in the next update, but just hang on! The window will close once it is done uploading.
To get your recording off of iTunes, plug you iPad into your computer. Open up iTunes and navigate to your device, then the Apps tap. Scroll down to "File Sharing," choose Chordion, and you should see a list of your recorded sounds (as well as any presets on your device).
SAVE

The SAVE screen lets you save & load your song settings.
The LOAD section allows you to load your previously saved songs. If you are connected to the internet, you can also load songs from NOISE:CLOUD. NOISE:CLOUD is a way for Chordion users to share their patches with each other. Simply choose NOISE:CLOUD and look around for an interesting sound patch to load. If you like it, you can RATE that song so that others know that it is a good one.
PLEASE NOTE : Ratings on NOISE:CLOUD are in beta right now. We have been alerted to some issues that we hope to resolve in the coming update. This will likely involve the clearing of previous ratings.
The SAVE section screen lets you save or overwrite your song. If you'd like to upload your song to NOISE:CLOUD for the whole world to play with, check the box! You'll need to sign up for an account, but don't worry it's free and easy.
SETTINGS & LINKS
The SETTINGS screen is probably how you ended up here in this manual. Log in and out of your Dropbox, SoundCloud, and Noise:Cloud accounts, and get in touch with us through the internet portal of your choosing.